Thursday, October 6, 2022

Troubleshooting a Tablet with a Teeny, Tiny Tile

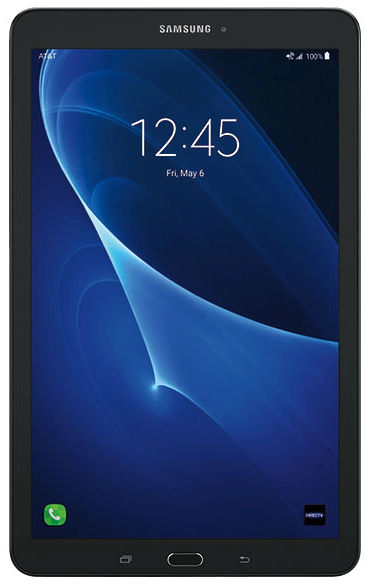
Tablet or smartphone repair is not fun, I hate it! That said, I managed a creative solution for my old Samsung Galaxy E 9.6 which I'd recently had to replace the battery on.

Removing the old battery and installing a new one was relatively easy. Carefully pry open the tablet, taking care to not damage its electronic internals, remove the old battery, install the new one, then close it up. Right?

Unfortunately, that turned out to be a best case scenario which was made worse thanks to the ribbon connector circled below. 


It wasn't the connector itself (fortunately the individual pins were intact), but the incredibly, aggravatingly delicate piece of plastic designed to snap atop the cable to connect solidly to the motherboard pins, also known formally as a ribbon cable snap.

I spent about an hour with a jeweler's loupe which clips on to a temple piece of your eyeglasses making like Popeye the sailor man and zooming in with one eye on the incredibly tiny pins trying to get a replacement ribbon connector clip (cannibalized from a nearly identical tablet purchased cheap off eBay due to a cracked and dead LCD screen) to assume the position.

Thanks to my frustration and a not quite true pair of forceps, I got nowhere. While the ribbon cable would slide in perfectly, without that infuriating clip in place I was unable to snap it down to make the connection hug between connector and motherboard. On top of that, the design of my tablet and the busted one was almost, but not quite, identical, and for all I knew the clip I salvaged might've been for a different type ribbon connector.

After that, I reflected on the fact that for a silly crafts-related idea I purchased a bag of miniature clay roof tiles meant for things like birdhouses, dollhouses, fake houses, train sets, and other realistic depictions of life in a smaller scale.


If you examine one of these tiles on its side, you'll notice it has a couple of curved sections, one around a quarter inch long, and another a bit less round and rather straight, with just a gentle curve. 


The latter got me thinking. What if I could carefully snap that piece off, and use it as a surrogate ribbon cable holder along with some duct tape (what else??) to secure it into place?

Turns out, it worked!

Using one of the tools out of a kit I got specifically for performing surgery on a tablet, I used a very thin and flexible metal pry tool as a firm edge against which to hold the small piece down, then gently but firmly applied force to snap it away.


Next, I carefully inserted the ribbon cable in its socket on the tablet board and ensured it was in under the pins as level and far as possible. At bottom in the photo above is a similar sliver of tile which I placed so that the curve was facing up as shown below, and so the rather cylindrical little edge (referenced by red arrow) was applying pressure to the ribbon cable just like the flimsy plastic connector would by design.


Success! Upon first verifying my touchscreen was working properly by carefully applying pressure with my fingers to the top of this improvised "clip", I then stuck the tablet motherboard and its connected components and snapped things back into place. The curve of the tile fragment seems adequate, at least, to ensure a nice, firm connection far more resilient than electrical or duct tape alone.


Aside from being nonconductive like its flimsy counterpart, the clay tile more importantly provides a sort of firm, structural pressure along the length of the pins to ensure they're firmly connected. For the touchscreen to work fully, all pins must be engaged, and without either the manufacturer's flimsy clip or this improvised solution, that wouldn't happen.


Sunday, August 21, 2022

When Your Smart TV Complains, "Unsupported Codec"

Sometimes in life we realize something after the fact that would be a superior solution to a compromise made early on out of haste or impatience.

Case in point, my Samsung "smart" TV's inability to support various video codecs for digital media like movies, TV shows, and other files. Up until now given this happens relatively rarely (but still happens), I've simply found another format or used the excellent and free tool Handbrake to re-encode the video into a more conventional one like MP4. However, upon trying to play and stream to my TV a set of old movies I'd obtained over a decade ago, all but a couple of these returned "unsupported codec" and were unplayable.

Enter the excellent gift my brother-in-law gave my wife and I, an Amazon Fire Stick. At under $30 this remarkably versatile device plugs into an available HDMI port on your TV and comes with its own remote with voice recognition to boot, as well as interoperability with Alexa if that's your thing (it's not mine).


Basically, you plug the Stick itself into the TV's HDMI, then run a USB cable from the provided AC adapter to a micro USB plug on the side of the Fire Stick. Then, turn on your smart TV and select the HDMI port your Fire Stick is plugged into as the video source. 

While it has lots of features including integration with numerous free and pay streaming services, the one that turned out to help in my situation tremendously is the fact that while depending on what smart TV you have, it may or may not allow you easy access in order to install Android apps, for example. Unfortunately, my model of Samsung TV is locked down pretty tight with its proprietary operating system and interface, and has a relatively slim collection of apps to choose from.


For example, I tried first to find a way to access files that are not video, audio, or photos from say a USB stick plugged into the TV. No joy there, only those specific files types are visible, precluding simply downloading a (hopefully) compatible .APK for VLC and installing it. Sure, while Samsung exposes an API for their TVs and other devices, I'm not inclined to break out my favorite IDE and trudge through the weeds of an unfamiliar platform just for a one-off workaround. 

However, thankfully the Fire Stick enables you to download any available apps on the Amazon app store, including VLC, and that's excellent, because VLC is a great app! The player is completely free thanks to the generosity of its developer team VideoLAN, a nonprofit organization.


Once the Fire Stick is set up with your wifi connection details, you can access streaming services and other network resources, including your networked NAS device, PCs, etc. on your home network. In my case I have most of my media on a
Synology NAS, so in VLC I'm able to browse its shared folders and pick what to play from its directory.


Since setting up the Fire Stick, all the video files I mentioned that the Samsung TV's own media player balked at were completely playable by VLC. That's one of my favorite things about VLC, it plays virtually every codec you might throw at it. It's got that comprehensive a collection of codecs that among the hundreds or thousands of videos I've played with it, I could count on one hand those I've had it fail to play (don't worry, not a mutant with more than five per hand).

Bonus, VLC enables you to seek out subtitles for your hearing impaired or hungover audience members, and will let you download multiple ones from the internet and pick and choose until you find one that syncs properly with your media's audio. 


One tip with that, when trying a particular set of subtitles, once you select it in VLC it will take just a few seconds before the subtitle text appears during playback. Don't hurry, just wait a bit so you can verify whether the subs are proper, and if not, download or pick another set, try again, and once you find one, off you go.


Sunday, March 27, 2022

Zoom Cannot Start Video With Older Webcams in Windows 10

I've had a Logitech QuickCam Fusion webcam since around the time Windows 7 was still mainstream. Other than from my work laptop I don't do online meetings so the camera largely went unused on my home desktop, even after upgrading to Windows 10. 

Then, one day my wife and I installed Zoom and wanted to test it out prior to her joining some Zoom calls with some of her old high school classmates. While her setup with Windows 10 and a relatively new (ca. 2021) webcam worked flawlessly, mine did not. Repeatedly Zoom would complain whether in the video settings or upon joining a meeting, "Cannot start video":


My solution took some trial and error but ultimately worked. First, unplug your webcam from its USB port, and then open Device Manager, and under Imaging devices, right-click on Logitech QuickCam Fusion (or whatever your older webcam is):


Ensure "Delete the driver software for this device" is checked so that whatever driver Windows may have initially used is removed, then click Uninstall and follow any prompts to remove the drivers:


Next, download and install the latest available drivers you can find for your old webcam, ideally for Windows 10, but at least for Windows 7. With some older webcams it's entirely possible you won't find any drivers let alone ones for Windows 7 or newer. If that's the case, skip the following.

Otherwise, on Logitech's site, upon searching for QuickCam Fusion, you'll notice the default operating system is set to Windows 11. Click and choose the only other option, Windows 7, and you'll be prompted to download the newest Windows drivers. 


Plug the webcam into a free USB port, and Windows will proceed to install either the driver you found and installed, or a compatible driver included with Windows. Assuming all goes well, from the Start menu type "Camera privacy settings" and ensure "Allow apps to access your camera" is set to On:


Further down the screen, ensure all apps (except Zoom, if listed) are set to Off:


Now, ensure "Allow desktop apps to access your camera" is set to On:


If you haven't already, install the latest Zoom desktop client. Before you proceed, go ahead and restart your PC to let Windows complete any post-configuration or housekeeping stuff that may linger. Then, once back at the desktop, create a system restore point to preserve things in case something blows up (unlikely, but always a possibility; my system decided to BSOD at least once during the process, better safe than sorry).

That's it. Upon opening Zoom and going into Settings => Video, you should see your face or whatever your webcam is currently seeing, and in meetings with video enabled things should proceed just fine.