Showing posts with label workaround. Show all posts

Thursday, October 6, 2022

Troubleshooting a Tablet with a Teeny, Tiny Tile

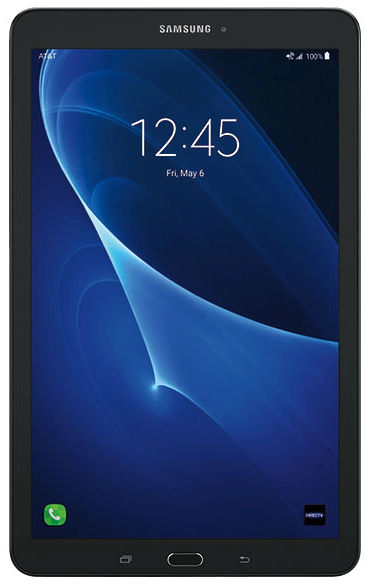
Tablet or smartphone repair is not fun, I hate it! That said, I managed a creative solution for my old Samsung Galaxy E 9.6 which I'd recently had to replace the battery on.

Removing the old battery and installing a new one was relatively easy. Carefully pry open the tablet, taking care to not damage its electronic internals, remove the old battery, install the new one, then close it up. Right?

Unfortunately, that turned out to be a best case scenario which was made worse thanks to the ribbon connector circled below. 


It wasn't the connector itself (fortunately the individual pins were intact), but the incredibly, aggravatingly delicate piece of plastic designed to snap atop the cable to connect solidly to the motherboard pins, also known formally as a ribbon cable snap.

I spent about an hour with a jeweler's loupe which clips on to a temple piece of your eyeglasses making like Popeye the sailor man and zooming in with one eye on the incredibly tiny pins trying to get a replacement ribbon connector clip (cannibalized from a nearly identical tablet purchased cheap off eBay due to a cracked and dead LCD screen) to assume the position.

Thanks to my frustration and a not quite true pair of forceps, I got nowhere. While the ribbon cable would slide in perfectly, without that infuriating clip in place I was unable to snap it down to make the connection hug between connector and motherboard. On top of that, the design of my tablet and the busted one was almost, but not quite, identical, and for all I knew the clip I salvaged might've been for a different type ribbon connector.

After that, I reflected on the fact that for a silly crafts-related idea I purchased a bag of miniature clay roof tiles meant for things like birdhouses, dollhouses, fake houses, train sets, and other realistic depictions of life in a smaller scale.


If you examine one of these tiles on its side, you'll notice it has a couple of curved sections, one around a quarter inch long, and another a bit less round and rather straight, with just a gentle curve. 


The latter got me thinking. What if I could carefully snap that piece off, and use it as a surrogate ribbon cable holder along with some duct tape (what else??) to secure it into place?

Turns out, it worked!

Using one of the tools out of a kit I got specifically for performing surgery on a tablet, I used a very thin and flexible metal pry tool as a firm edge against which to hold the small piece down, then gently but firmly applied force to snap it away.


Next, I carefully inserted the ribbon cable in its socket on the tablet board and ensured it was in under the pins as level and far as possible. At bottom in the photo above is a similar sliver of tile which I placed so that the curve was facing up as shown below, and so the rather cylindrical little edge (referenced by red arrow) was applying pressure to the ribbon cable just like the flimsy plastic connector would by design.


Success! Upon first verifying my touchscreen was working properly by carefully applying pressure with my fingers to the top of this improvised "clip", I then stuck the tablet motherboard and its connected components and snapped things back into place. The curve of the tile fragment seems adequate, at least, to ensure a nice, firm connection far more resilient than electrical or duct tape alone.


Aside from being nonconductive like its flimsy counterpart, the clay tile more importantly provides a sort of firm, structural pressure along the length of the pins to ensure they're firmly connected. For the touchscreen to work fully, all pins must be engaged, and without either the manufacturer's flimsy clip or this improvised solution, that wouldn't happen.


Friday, May 6, 2016

Steam Failed to Start Game (App Already Running)


A few Steam client versions prior to the 4/29/2016 build, I began receiving the following error when attempting to start Garry's Mod (aka GMod):


Steam reports it is still running even though I had cleanly exited via GMod's interface:


Following the Steam support site link got me nowhere, and googling revealed this bug has occurred in the past more than once (perhaps Valve needs to do better at regression testing?), with no solutions that jumped out. I did discover though that ending the Steam.exe process tree in Task Manager, and then deleting some cached files in Steam's appcache folder, seems to at least work around the problem. 


Manually this is a bit of a pain, but there is a way to automate this particular workaround which involves creating a batch file to run GMod instead of using the default shortcut Steam creates for it. Here's how. 
  1. Right-click on the desktop shortcut for Garry's Mod, then click Properties.
  2. Click twice to select the text in the URL box, then hit Ctrl-C to copy it to the clipboard.

  3. Open a text editor (I like Notepad++) and hit Ctrl-V to paste the URL into it, and then type the word START and a blank space so that it looks like this:
    START steam://rungameid/4000

  4. Above the URL you just pasted, copy and paste the following text:
    TASKKILL /IM "Steam.exe" /T /F

    The batch file should now look something like this:


  5. Save the file with whatever file name (I used gmod) and the extension .BAT (for batch file) on your Desktop or wherever makes sense. Then, you can either click twice to run it directly, or create a shortcut and use that instead.


When the batch file is run, this will tell Windows to first execute TASKKILL (a built-in Windows utility) and tell it to close Steam.exe (/IM "Steam.exe") along with any child processes in its process "tree" (/T) forcibly (/F). After that, it will then start a new process to open Steam and then GMod. It'll be as if you'd gone through the steps described above manually, only without the manual part.

The above can be adapted for most any other Steam game having this problem; you'd simply open that other game's shortcut in step 2 and go from there to create a new batch file for it.