Showing posts with label troubleshooting. Show all posts

Sunday, May 7, 2023

Hard Drive Replacement and USB

Just got a shiny new Western Digital Black 10TB hard drive to replace my somewhat ailing WD 6TB Blue with just over 10 years of solid 24/7 performance. 


Electromechanical hard drives like many electronics in general will likely go the distance if no failures develop in the first few days, weeks, months of use, but over time they do simply begin to wear out. My venerable drive for games and media was beginning to develop subtle issues, like large copy operations interrupted with occasional retries but finally completing, or files that suddenly proved unreadable when trying to access them.

S.M.A.R.T. software on board reported no anomalies other than some higher than normal temperatures (mostly due to a dead case fan I replaced along with the drive) and a couple hundred sector reallocations indicating the drive found some  physically bad sectors and moved what data it could to different ones.

I decided to go the relatively lazy route of taking the old drive out, installing the new one, and planning to transfer the data via USB 3.0. Lazy, mainly because given I'd already installed the new drive and put my rig back together I didn't want to crack the case open again despite the significantly faster direct SATA transfer speeds. That prompted a series of irritating events and I wouldn't be sharing them here otherwise, in case you, dear reader, have recently experienced the following yourself, so there's that.

Upon rebooting my Windows 10 system, all was well for the most part except for the fact that upon opening Disk Management to initialize, allocate partitions, and format the drive, my system suffered its first BSOD of the afternoon, citing a file mrcbt.sys which belongs to backup software I use, Macrium Reflect. Simply restarting afterward seems to have gotten around that issue and my setup booted normally with the newly partitioned and formatted 10TB drive online.

New drive up and running in Disk Management.

Here's where things got irritating. Using a decent USB 3 external hard drive bay by Sabrent I installed my old drive, powered the enclosure up, then plugged it into my USB 3 hub. Immediate BSOD, citing "memory management" issues with no mention of specific files.

I fell back to review my options after a couple more tries leading to the same outcome. I could hook the enclosure up to my wife's PC on our LAN, share it from there, and transfer over the wire. This though would add a lot more time and overhead on top of asking a lot of my senior citizen hard drive in its time of subtle decline. Also, could've hooked it up to a laptop but that would take even longer for transfer of the over 4 TB of data and burden the old drive further.

Ultimately I paid for my laziness and ended up cracking the case open, and as I type the old drive is resting a bit precariously but securely on the floor beside the case providing data to the new drive. Meanwhile I wondered why memory, in this case, was cited as the culprit.

Even after decades of supporting it, Windows to me is largely a black box, even with almost a decade of software and database development on Windows systems. I don't care to delve into the plumbing and avoid doing so whenever possible, but one thing I recalled is the fact that I had been using the old drive to host my system's page file as well as the go-to place for applications and the OS to store temporary files.

From my wife's PC I plugged the drive enclosure in with the old drive on board and tried to delete the TEMP folder. Curiously, Windows wouldn't allow me to do so, presumably because my user account on my PC was owner of that folder. Okay, so I took ownership of the TEMP folder, and then tried to delete all the contents. Curiously, even this didn't quite work. As is typical when trying to delete files from your page file and temp file folder in this case one file refused to be deleted from Windows Explorer.

I opened an administrator authorized Command Prompt, and curiously it not only didn't allow me to delete the file, but kept complaining the file could not be found. What? It's right there, what gives?? I found even after taking ownership, even after being allowed in Explorer to rename the TEMP folder, that one file, a GUID named one resembling daf2743a-311f-4315-9272-be2dca1fa178.tmp, refused to die. Even deleting the folder failed though renaming worked. Weird!

Sabrent USB 3 drive enclosure, for 2.5" and 3.5" drives / SSDs.


I'm used to situations where a Windows PC might BSOD if certain types of USB thumb drives or other peripherals are plugged in and powered on at boot, but this wasn't the case here as the system BSOD'd whether the drive was connected via USB at boot or after the fact. 
That on a foreign system Windows seemingly "respected" the other system's TEMP folder as seems the case here is curious, but perhaps something prompted for security reasons. 

Maybe for Microsoft it was sort of a quick and dirty remediation for a security vulnerability involving bad actors trying to recover data from a stolen operating system drive, where that TEMP folder would typically reside. This though just happened to be a case where instead of using my main SSD with the operating system for it I was using my media drive to house the pagefile and temp files, so perhaps that's why events conspired to not allow that magic to happen via USB.

Simply connecting the old drive directly via SATA to my rig to do the transfer has been operating for minutes now without issue, and given the old drive's TEMP folder still lingers, USB may be the extra ingredient that frustrated my initial, lazy attempts.


Thursday, October 6, 2022

Troubleshooting a Tablet with a Teeny, Tiny Tile

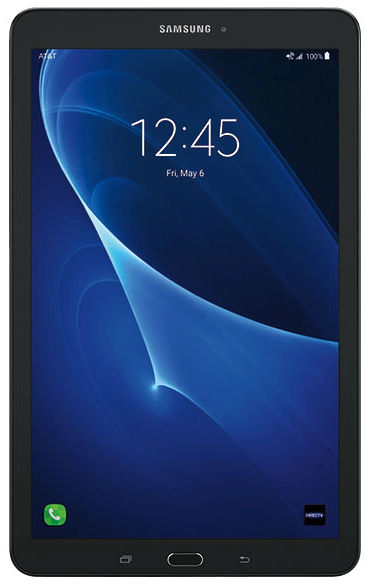
Tablet or smartphone repair is not fun, I hate it! That said, I managed a creative solution for my old Samsung Galaxy E 9.6 which I'd recently had to replace the battery on.

Removing the old battery and installing a new one was relatively easy. Carefully pry open the tablet, taking care to not damage its electronic internals, remove the old battery, install the new one, then close it up. Right?

Unfortunately, that turned out to be a best case scenario which was made worse thanks to the ribbon connector circled below. 


It wasn't the connector itself (fortunately the individual pins were intact), but the incredibly, aggravatingly delicate piece of plastic designed to snap atop the cable to connect solidly to the motherboard pins, also known formally as a ribbon cable snap.

I spent about an hour with a jeweler's loupe which clips on to a temple piece of your eyeglasses making like Popeye the sailor man and zooming in with one eye on the incredibly tiny pins trying to get a replacement ribbon connector clip (cannibalized from a nearly identical tablet purchased cheap off eBay due to a cracked and dead LCD screen) to assume the position.

Thanks to my frustration and a not quite true pair of forceps, I got nowhere. While the ribbon cable would slide in perfectly, without that infuriating clip in place I was unable to snap it down to make the connection hug between connector and motherboard. On top of that, the design of my tablet and the busted one was almost, but not quite, identical, and for all I knew the clip I salvaged might've been for a different type ribbon connector.

After that, I reflected on the fact that for a silly crafts-related idea I purchased a bag of miniature clay roof tiles meant for things like birdhouses, dollhouses, fake houses, train sets, and other realistic depictions of life in a smaller scale.


If you examine one of these tiles on its side, you'll notice it has a couple of curved sections, one around a quarter inch long, and another a bit less round and rather straight, with just a gentle curve. 


The latter got me thinking. What if I could carefully snap that piece off, and use it as a surrogate ribbon cable holder along with some duct tape (what else??) to secure it into place?

Turns out, it worked!

Using one of the tools out of a kit I got specifically for performing surgery on a tablet, I used a very thin and flexible metal pry tool as a firm edge against which to hold the small piece down, then gently but firmly applied force to snap it away.


Next, I carefully inserted the ribbon cable in its socket on the tablet board and ensured it was in under the pins as level and far as possible. At bottom in the photo above is a similar sliver of tile which I placed so that the curve was facing up as shown below, and so the rather cylindrical little edge (referenced by red arrow) was applying pressure to the ribbon cable just like the flimsy plastic connector would by design.


Success! Upon first verifying my touchscreen was working properly by carefully applying pressure with my fingers to the top of this improvised "clip", I then stuck the tablet motherboard and its connected components and snapped things back into place. The curve of the tile fragment seems adequate, at least, to ensure a nice, firm connection far more resilient than electrical or duct tape alone.


Aside from being nonconductive like its flimsy counterpart, the clay tile more importantly provides a sort of firm, structural pressure along the length of the pins to ensure they're firmly connected. For the touchscreen to work fully, all pins must be engaged, and without either the manufacturer's flimsy clip or this improvised solution, that wouldn't happen.


Sunday, August 21, 2022

When Your Smart TV Complains, "Unsupported Codec"

Sometimes in life we realize something after the fact that would be a superior solution to a compromise made early on out of haste or impatience.

Case in point, my Samsung "smart" TV's inability to support various video codecs for digital media like movies, TV shows, and other files. Up until now given this happens relatively rarely (but still happens), I've simply found another format or used the excellent and free tool Handbrake to re-encode the video into a more conventional one like MP4. However, upon trying to play and stream to my TV a set of old movies I'd obtained over a decade ago, all but a couple of these returned "unsupported codec" and were unplayable.

Enter the excellent gift my brother-in-law gave my wife and I, an Amazon Fire Stick. At under $30 this remarkably versatile device plugs into an available HDMI port on your TV and comes with its own remote with voice recognition to boot, as well as interoperability with Alexa if that's your thing (it's not mine).


Basically, you plug the Stick itself into the TV's HDMI, then run a USB cable from the provided AC adapter to a micro USB plug on the side of the Fire Stick. Then, turn on your smart TV and select the HDMI port your Fire Stick is plugged into as the video source. 

While it has lots of features including integration with numerous free and pay streaming services, the one that turned out to help in my situation tremendously is the fact that while depending on what smart TV you have, it may or may not allow you easy access in order to install Android apps, for example. Unfortunately, my model of Samsung TV is locked down pretty tight with its proprietary operating system and interface, and has a relatively slim collection of apps to choose from.


For example, I tried first to find a way to access files that are not video, audio, or photos from say a USB stick plugged into the TV. No joy there, only those specific files types are visible, precluding simply downloading a (hopefully) compatible .APK for VLC and installing it. Sure, while Samsung exposes an API for their TVs and other devices, I'm not inclined to break out my favorite IDE and trudge through the weeds of an unfamiliar platform just for a one-off workaround. 

However, thankfully the Fire Stick enables you to download any available apps on the Amazon app store, including VLC, and that's excellent, because VLC is a great app! The player is completely free thanks to the generosity of its developer team VideoLAN, a nonprofit organization.


Once the Fire Stick is set up with your wifi connection details, you can access streaming services and other network resources, including your networked NAS device, PCs, etc. on your home network. In my case I have most of my media on a
Synology NAS, so in VLC I'm able to browse its shared folders and pick what to play from its directory.


Since setting up the Fire Stick, all the video files I mentioned that the Samsung TV's own media player balked at were completely playable by VLC. That's one of my favorite things about VLC, it plays virtually every codec you might throw at it. It's got that comprehensive a collection of codecs that among the hundreds or thousands of videos I've played with it, I could count on one hand those I've had it fail to play (don't worry, not a mutant with more than five per hand).

Bonus, VLC enables you to seek out subtitles for your hearing impaired or hungover audience members, and will let you download multiple ones from the internet and pick and choose until you find one that syncs properly with your media's audio. 


One tip with that, when trying a particular set of subtitles, once you select it in VLC it will take just a few seconds before the subtitle text appears during playback. Don't hurry, just wait a bit so you can verify whether the subs are proper, and if not, download or pick another set, try again, and once you find one, off you go.


Sunday, March 27, 2022

Zoom Cannot Start Video With Older Webcams in Windows 10

I've had a Logitech QuickCam Fusion webcam since around the time Windows 7 was still mainstream. Other than from my work laptop I don't do online meetings so the camera largely went unused on my home desktop, even after upgrading to Windows 10. 

Then, one day my wife and I installed Zoom and wanted to test it out prior to her joining some Zoom calls with some of her old high school classmates. While her setup with Windows 10 and a relatively new (ca. 2021) webcam worked flawlessly, mine did not. Repeatedly Zoom would complain whether in the video settings or upon joining a meeting, "Cannot start video":


My solution took some trial and error but ultimately worked. First, unplug your webcam from its USB port, and then open Device Manager, and under Imaging devices, right-click on Logitech QuickCam Fusion (or whatever your older webcam is):


Ensure "Delete the driver software for this device" is checked so that whatever driver Windows may have initially used is removed, then click Uninstall and follow any prompts to remove the drivers:


Next, download and install the latest available drivers you can find for your old webcam, ideally for Windows 10, but at least for Windows 7. With some older webcams it's entirely possible you won't find any drivers let alone ones for Windows 7 or newer. If that's the case, skip the following.

Otherwise, on Logitech's site, upon searching for QuickCam Fusion, you'll notice the default operating system is set to Windows 11. Click and choose the only other option, Windows 7, and you'll be prompted to download the newest Windows drivers. 


Plug the webcam into a free USB port, and Windows will proceed to install either the driver you found and installed, or a compatible driver included with Windows. Assuming all goes well, from the Start menu type "Camera privacy settings" and ensure "Allow apps to access your camera" is set to On:


Further down the screen, ensure all apps (except Zoom, if listed) are set to Off:


Now, ensure "Allow desktop apps to access your camera" is set to On:


If you haven't already, install the latest Zoom desktop client. Before you proceed, go ahead and restart your PC to let Windows complete any post-configuration or housekeeping stuff that may linger. Then, once back at the desktop, create a system restore point to preserve things in case something blows up (unlikely, but always a possibility; my system decided to BSOD at least once during the process, better safe than sorry).

That's it. Upon opening Zoom and going into Settings => Video, you should see your face or whatever your webcam is currently seeing, and in meetings with video enabled things should proceed just fine.


Monday, November 1, 2021

Mouse Back/Forward Buttons Stop Working in Windows 10

Recently, inexplicably, my wireless bluetooth iClever mouse decided that its thumb buttons used for stuff like forward and back in browsers and Windows Explorer and other applications should no longer work.


No idea if a recent Windows 10 update was the culprit or what, but I found a very simple solution via a post on Reddit. Simply unplug the mouse's little USB transceiver and plug it into a different USB port on your PC. 

That's it. That's the post.

I'd already tried removing all bluetooth devices from Device Manager including hidden ones and rebooting, no joy. No clue if should this happen enough times if I might eventually run out of USB ports my mouse deigns to allow control of it. 


Tuesday, March 16, 2021

Prevent Docker for Windows Auto Update

I recently installed Docker Desktop in order to then install PiHole on my Windows 10 desktop PC. PiHole is a cool and free little utility that you can install as a Docker container to provide ad blocking capability that goes a step further than a browser ad blocker add-on like say UBlock Origin. Once installed you can have your PC serve as a sort of DNS proxy for your entire network which bypasses a wide array of blacklisted IP addresses and domains.

One annoying and frankly impolite "feature" of Docker Desktop in general is that some time ago (possibly after version 2.5 or thereabouts) they removed an option through the GUI to disable automatic updates. This is irritating because what you might expect happened to me; a newer, buggy version once installed caused Docker to behave erratically and crash frequently. 

I took a quick look at the Docker documentation (Dockermentation??) and while there are command line options to disable auto updates in the Docker daemon I haven't got the patience to figure out what syntax to use; I mean come on, I'm so lazy I'm using Windows 10, right?

Instead I tried to find out where Docker downloads its updated versions, and I believe I found that folder as shown below. From the Start menu you can type in C:\Users\<Windows username>\AppData\Local\Docker Desktop Installer:


Docker's systray icon will conspicuously show a little "i" to inform you of a looming upgrade, and at the next restart of Docker Desktop the upgrade ordinarily will be installed. However, in lazily taking a stab at preventing this behavior I decided to alter the file system attributes of the folder containing the updates to make it and its contents read-only.

The idea is to both prevent updates from being downloaded in the first place, and in case Docker normally attempts to write any temp files to that folder as part of the upgrade process to kneecap its ability to do so and maybe indicate to that logic something's up that makes upgrading a bad idea.


I altered the folder attributes and applied them, then exited Docker via the systray icon and after a minute or so opened the shortcut. I checked the version first of all:


I was rewarded not with Docker dictating the 3.2.x version I'd use going forward, but rather the previous 3.1.x version I downgraded to in order to not get stuck with the buggy behavior of the newer but less stable version. Success!


I also noticed the conspicuous "i" was gone, as if the logic quietly decided the attempt to upgrade never even happened, which is fine by me.

Of course this isn't the optimal way to prevent software from doing its thing despite user preference, but in these "challenging" times laziness reigns supreme in my headspace. Possible caveats may be that the next time you manually upgrade to a newer version you might need to reapply this change to your file system (too lazy to post a batch file to do it, sorry!) but that's minor compared to browsing on my tablet across the house from my PC and having Docker crash and take out my PiHole.


Sunday, June 25, 2017

Washed Out Color With NVIDIA Graphics

I recently purchased a brand new ASUS VE278H 27" LED-backlit monitor.

http://amzn.to/2u3zhWX


While a wonderfully big and bright display (especially paired with my NVIDIA GeForce GTX 1060 video card), once set up (using the DVI interface) dark colors, particularly blues and blacks, appeared washed out.

BEFORE: Blue / black wallpaper on DVI, note the rather nasty gradients.

After some research (most of which seemed to focus on display issues related to using the HDMI interface), I did find a solution which seemed to help in my case.

Generally with NVIDIA I install their Control Panel to tweak cards with an NVIDIA chipset. There's a setting under Display => Change Resolution called Output Dynamic Range which purports to preserve shadow and highlight details.


By default this setting is "Limited", but by changing it to "Full" and then clicking Apply, I was rewarded with the beautifully silky-smooth blues and blacks I expected.

AFTER: Significantly richer, silkier color.


Why not have this set to Full by default? It is a mystery for NVIDIA to address. 🤔


Wednesday, December 7, 2016

Starry Sky Troubleshooting


Starry Sky is a holiday light projector which projects patterns of red and green laser wherever you point it... assuming it works.

Projection similar to the one the Starry Sky product creates.


I purchased one of these through Amazon, and it didn't take long at all to see why this particular product is no longer available. Just one night after setting it up in my front yard, the green light disappeared, leaving just the red. Picking it up and shaking gently yielded a disconcerting rattling inside.

https://www.amazon.com/Starry-Sky-Projector-Spotlight-Waterproof/dp/B01FVYXV3W?tag=darthconti-20 
 
 
I carefully disassembled it and took stock of the design (no photos, so I'll try to describe as best I can). Inside is a DC motor, with a gear that's linked to two other gears on spindles linked to each laser. The spindles each have a tiny, square plastic filter which splits the laser beam into various patterns as the gears rotate. 

Beneath each spindle, the lasers are each enclosed in a cylindrical aluminum heat sink to dissipate heat, and the heat sinks mate with the spindles and, in turn, the gears, with a threaded connection. The problem I encountered is that in operation, the green laser decided to unscrew and fall away from its mounting.

The solution was pretty easy, apply some Loctite thread locker to the threads and screw the green laser's heat sink back into its spindle. After this the device seemed to work normally.

In case you don't care for the ever-changing patterns of red and green, there's a simple fix. First off, the wiring to power the DC motor runs to a small molex type connector (pictured below); simply disconnect the motor so it no longer receives power.


Then, undo the screw holding the motor's gear in place and carefully lift the gear away; now note the lasers' spindles spin freely. Next, connect the plug to a convenient electrical outlet and of course keeping the lasers safely away from your eyes, rotate the red and green gears to alter the scatter pattern of each laser until there's a satisfactory balance of red and green. Once that's the case, replace the motor's gear and screw it back on so it stays fixed.

It may take some trial and error to ensure a satisfactory brightness and pattern are emitted, so don't firmly tighten all the screws right away; just tighten one so things are reasonably in place, then test it wherever you plan to place the projector.

Review products carefully and pick one that does what you want it to do but isn't rife with poor quality control as demonstrated here.