Showing posts with label repair. Show all posts

Thursday, October 6, 2022

Troubleshooting a Tablet with a Teeny, Tiny Tile

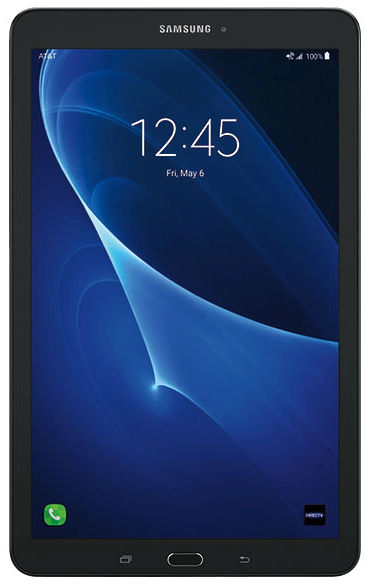
Tablet or smartphone repair is not fun, I hate it! That said, I managed a creative solution for my old Samsung Galaxy E 9.6 which I'd recently had to replace the battery on.

Removing the old battery and installing a new one was relatively easy. Carefully pry open the tablet, taking care to not damage its electronic internals, remove the old battery, install the new one, then close it up. Right?

Unfortunately, that turned out to be a best case scenario which was made worse thanks to the ribbon connector circled below. 


It wasn't the connector itself (fortunately the individual pins were intact), but the incredibly, aggravatingly delicate piece of plastic designed to snap atop the cable to connect solidly to the motherboard pins, also known formally as a ribbon cable snap.

I spent about an hour with a jeweler's loupe which clips on to a temple piece of your eyeglasses making like Popeye the sailor man and zooming in with one eye on the incredibly tiny pins trying to get a replacement ribbon connector clip (cannibalized from a nearly identical tablet purchased cheap off eBay due to a cracked and dead LCD screen) to assume the position.

Thanks to my frustration and a not quite true pair of forceps, I got nowhere. While the ribbon cable would slide in perfectly, without that infuriating clip in place I was unable to snap it down to make the connection hug between connector and motherboard. On top of that, the design of my tablet and the busted one was almost, but not quite, identical, and for all I knew the clip I salvaged might've been for a different type ribbon connector.

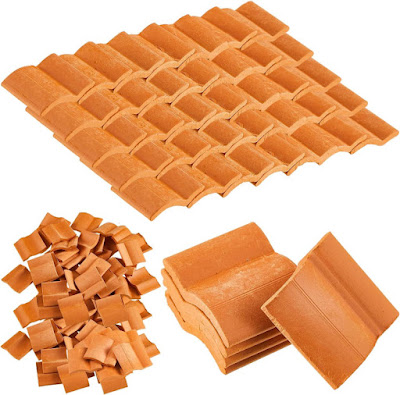
After that, I reflected on the fact that for a silly crafts-related idea I purchased a bag of miniature clay roof tiles meant for things like birdhouses, dollhouses, fake houses, train sets, and other realistic depictions of life in a smaller scale.


If you examine one of these tiles on its side, you'll notice it has a couple of curved sections, one around a quarter inch long, and another a bit less round and rather straight, with just a gentle curve. 


The latter got me thinking. What if I could carefully snap that piece off, and use it as a surrogate ribbon cable holder along with some duct tape (what else??) to secure it into place?

Turns out, it worked!

Using one of the tools out of a kit I got specifically for performing surgery on a tablet, I used a very thin and flexible metal pry tool as a firm edge against which to hold the small piece down, then gently but firmly applied force to snap it away.


Next, I carefully inserted the ribbon cable in its socket on the tablet board and ensured it was in under the pins as level and far as possible. At bottom in the photo above is a similar sliver of tile which I placed so that the curve was facing up as shown below, and so the rather cylindrical little edge (referenced by red arrow) was applying pressure to the ribbon cable just like the flimsy plastic connector would by design.


Success! Upon first verifying my touchscreen was working properly by carefully applying pressure with my fingers to the top of this improvised "clip", I then stuck the tablet motherboard and its connected components and snapped things back into place. The curve of the tile fragment seems adequate, at least, to ensure a nice, firm connection far more resilient than electrical or duct tape alone.


Aside from being nonconductive like its flimsy counterpart, the clay tile more importantly provides a sort of firm, structural pressure along the length of the pins to ensure they're firmly connected. For the touchscreen to work fully, all pins must be engaged, and without either the manufacturer's flimsy clip or this improvised solution, that wouldn't happen.


Tuesday, May 10, 2011

Solar Pool Heater DIY Leak Repair

Mighty Putty is one of the last products sponsored in part by the late Billy Mays.


Boasting the ability to bond numerous materials with the holding power of epoxy, including water pipes, I wondered whether this stuff could tackle a problem with some leaking HiTec solar pool heating panels.

Some years ago, I had a HiTec solar system installed to heat my swimming pool with solar energy. Consisting of a series of black panels of tubes which convey pool water up and onto the roof, given enough sunlight the system makes an otherwise chilly pool very swimmable.

Made of a rigid, ultraviolet-resistant plastic, the panels can be damaged by, say, falling tree branches or, as my contractor claimed, squirrels. The contractor who installed the system claimed that leaks that had developed in a couple of the panels recently were attributable to "squirrel damage" which conveniently for them is one type not covered by the manufacturer's limited warranty. 

Aside from the fact that no plastic-hungry squirrels nor squirrel spoor laden with plastic shavings had been discovered on my property, making determining the actual cause of the damage a difficult enterprise to say the least, this also meant that the contractor would be able to collect a roughly $135 service call fee to service the system for an out-of-warranty repair. How convenient that the contractor could fall back on these dastardly, elusive squirrels as the cause and not something actually covered by the warranty!


Commonly found, uncommonly evil, or so the contractor claims...


I wondered whether Mighty Putty might be able to save me some money.

I had basically two types of defects that had arisen in one of the panel arrays. One was a section of one of the tubes that appeared to have cracked off, a structural defect about 2" long.


Before application... a huge chunk of tube is missing.


Another consisted of pinhole leaks caused by abrasions to the plastic tubing, whether by falling tree branches impacting the panels, or the aforementioned scrabbling squirrels. Generally, since a solar system benefits from as much sun exposure as possible, installation under trees is inadvisable, but sometimes unavoidable. Unfortunately, a pine tree, a few of whose branches overhang the roof, probably were the culprit, both as a result of falling debris and as a squirrel habitat.

Following the instructions, I sliced about a 1" wide section of Mighty Putty, and kneaded it thoroughly for several minutes until it became a uniform, grayish consistency indicating that it's ready for use.

I roughened the area around the breach with some sandpaper and blew the resulting dust away. Then, I molded the putty into roughly the shape of a drinking straw cut in half lengthwise, large enough to encompass the hole and replace the missing plastic. Finally, I molded the putty patch onto the empty area and took care to apply even pressure all along the seam to ensure maximum contact with the plastic.

After application, covering the gap.


The pinhole leaks required slightly less putty to fix, but a similar process. To these I applied small dabs of putty sufficient to completely cover the holes.

For plumbing repairs, the makers of Mighty Putty boast a cure time of as little as 30 minutes before pressure is restored. HiTec states that their panels are pressure tested up to 90 psi, but that typically a swimming pool solar heating system will hover around 20 to 40 psi. I figured that this pressure is probably less than that of household plumbing. I would soon find out for sure. I climbed the roof, applied the putty, and allowed it to set for a full 24 hours just to be safe. The result? 

Success! The putty stopped the leaks in their tracks. 

It remains to be seen whether the putty will stand up to daily exposure to sun and chlorinated, pressurized pool water, but for now, the putty fully filled my expectations for far less than the cost of a service call, as well as saving me the time and trouble that would necessitate getting the perforated panel replaced outright.


Well done, Billy Mays. R.I.P.