Sometimes in life we realize something after the fact that would be a superior solution to a compromise made early on out of haste or impatience.

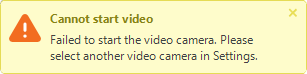
Case in point, my Samsung "smart" TV's inability to support various video codecs for digital media like movies, TV shows, and other files. Up until now given this happens relatively rarely (but still happens), I've simply found another format or used the excellent and free tool Handbrake to re-encode the video into a more conventional one like MP4. However, upon trying to play and stream to my TV a set of old movies I'd obtained over a decade ago, all but a couple of these returned "unsupported codec" and were unplayable.
Enter the excellent gift my brother-in-law gave my wife and I, an Amazon Fire Stick. At under $30 this remarkably versatile device plugs into an available HDMI port on your TV and comes with its own remote with voice recognition to boot, as well as interoperability with Alexa if that's your thing (it's not mine).

Basically, you plug the Stick itself into the TV's HDMI, then run a USB cable from the provided AC adapter to a micro USB plug on the side of the Fire Stick. Then, turn on your smart TV and select the HDMI port your Fire Stick is plugged into as the video source.
While it has lots of features including integration with numerous free and pay streaming services, the one that turned out to help in my situation tremendously is the fact that while depending on what smart TV you have, it may or may not allow you easy access in order to install Android apps, for example. Unfortunately, my model of Samsung TV is locked down pretty tight with its proprietary operating system and interface, and has a relatively slim collection of apps to choose from.

For example, I tried first to find a way to access files that are not video, audio, or photos from say a USB stick plugged into the TV. No joy there, only those specific files types are visible, precluding simply downloading a (hopefully) compatible .APK for VLC and installing it. Sure, while Samsung exposes an API for their TVs and other devices, I'm not inclined to break out my favorite IDE and trudge through the weeds of an unfamiliar platform just for a one-off workaround.
However, thankfully the Fire Stick enables you to download any available apps on the Amazon app store, including VLC, and that's excellent, because VLC is a great app! The player is completely free thanks to the generosity of its developer team VideoLAN, a nonprofit organization.

Once the Fire Stick is set up with your wifi connection details, you can access streaming services and other network resources, including your networked NAS device, PCs, etc. on your home network. In my case I have most of my media on a Synology NAS, so in VLC I'm able to browse its shared folders and pick what to play from its directory.

Since setting up the Fire Stick, all the video files I mentioned that the Samsung TV's own media player balked at were completely playable by VLC. That's one of my favorite things about VLC, it plays virtually every codec you might throw at it. It's got that comprehensive a collection of codecs that among the hundreds or thousands of videos I've played with it, I could count on one hand those I've had it fail to play (don't worry, not a mutant with more than five per hand).
Bonus, VLC enables you to seek out subtitles for your hearing impaired or hungover audience members, and will let you download multiple ones from the internet and pick and choose until you find one that syncs properly with your media's audio.

One tip with that, when trying a particular set of subtitles, once you select it in VLC it will take just a few seconds before the subtitle text appears during playback. Don't hurry, just wait a bit so you can verify whether the subs are proper, and if not, download or pick another set, try again, and once you find one, off you go.